Concrete Canoe
In my freshman year, I participated in a semester-long project where I was tasked with creating a miniature concrete canoe. Whomever's canoe held the most mass before sinking was declared the winner of the competition. I worked long hours to design the concrete mixture, considering cured density and hardness, moldability, and structural integrity. I created standardized concrete samples for structural testing and used 3D printed for these samples and the final canoe. The final canoe was able to hold over double the nearest competitor and demonstrated my perseverance and drive to create not just a winning design, but a design that dominated the competition.
Design
The college set defined requirements that all competitors had to adhere to.
R.1 May not exceed 18" x 6" x 5".
R.2 Concrete must be composed of water, cement, and aggregate(s).
R.3 The surface of the canoe must be smooth.
R.4 The canoe must have a “V-shaped” front, rear, and cross section.
R.5 The canoe cannot be sealed using a waterproofing material.
R.6 All under $40 (not including donated/existing materials).
I wrote a large research document on concrete, molding, processing, and relevant trade studies for wall thickness and mold type. This document also included budgeting to stay under the $40 limit and testing procedures for future test articles.
I quickly iterated the design of the boat to maximize the weight it could hold without breaking the constraints.
I was able to extract water displacement and estimated weight of the canoe from the Fusion model to determine the design's characteristics. Reducing the weight of the canoe as much as possible was necessary, so I decided to use the thinnest wall I could, just 5 mm.
The concrete consisted of a standard cement powder, an ultra light aggregate called glass microspheres, and glass fibers for added tensile strength to reduce crack propagation.
Visualization of the design improvements across the four major versions.
Testing
Using the testing procedures I previously designed as well as molding and curing standardized slabs of concrete, I was able to characteristize the parameters of various concrete mixtures to find the optimal balance of strength and weight.
I tested these samples to destruction using a beam tester placed upon a standard kitchen scale to record the failure load.
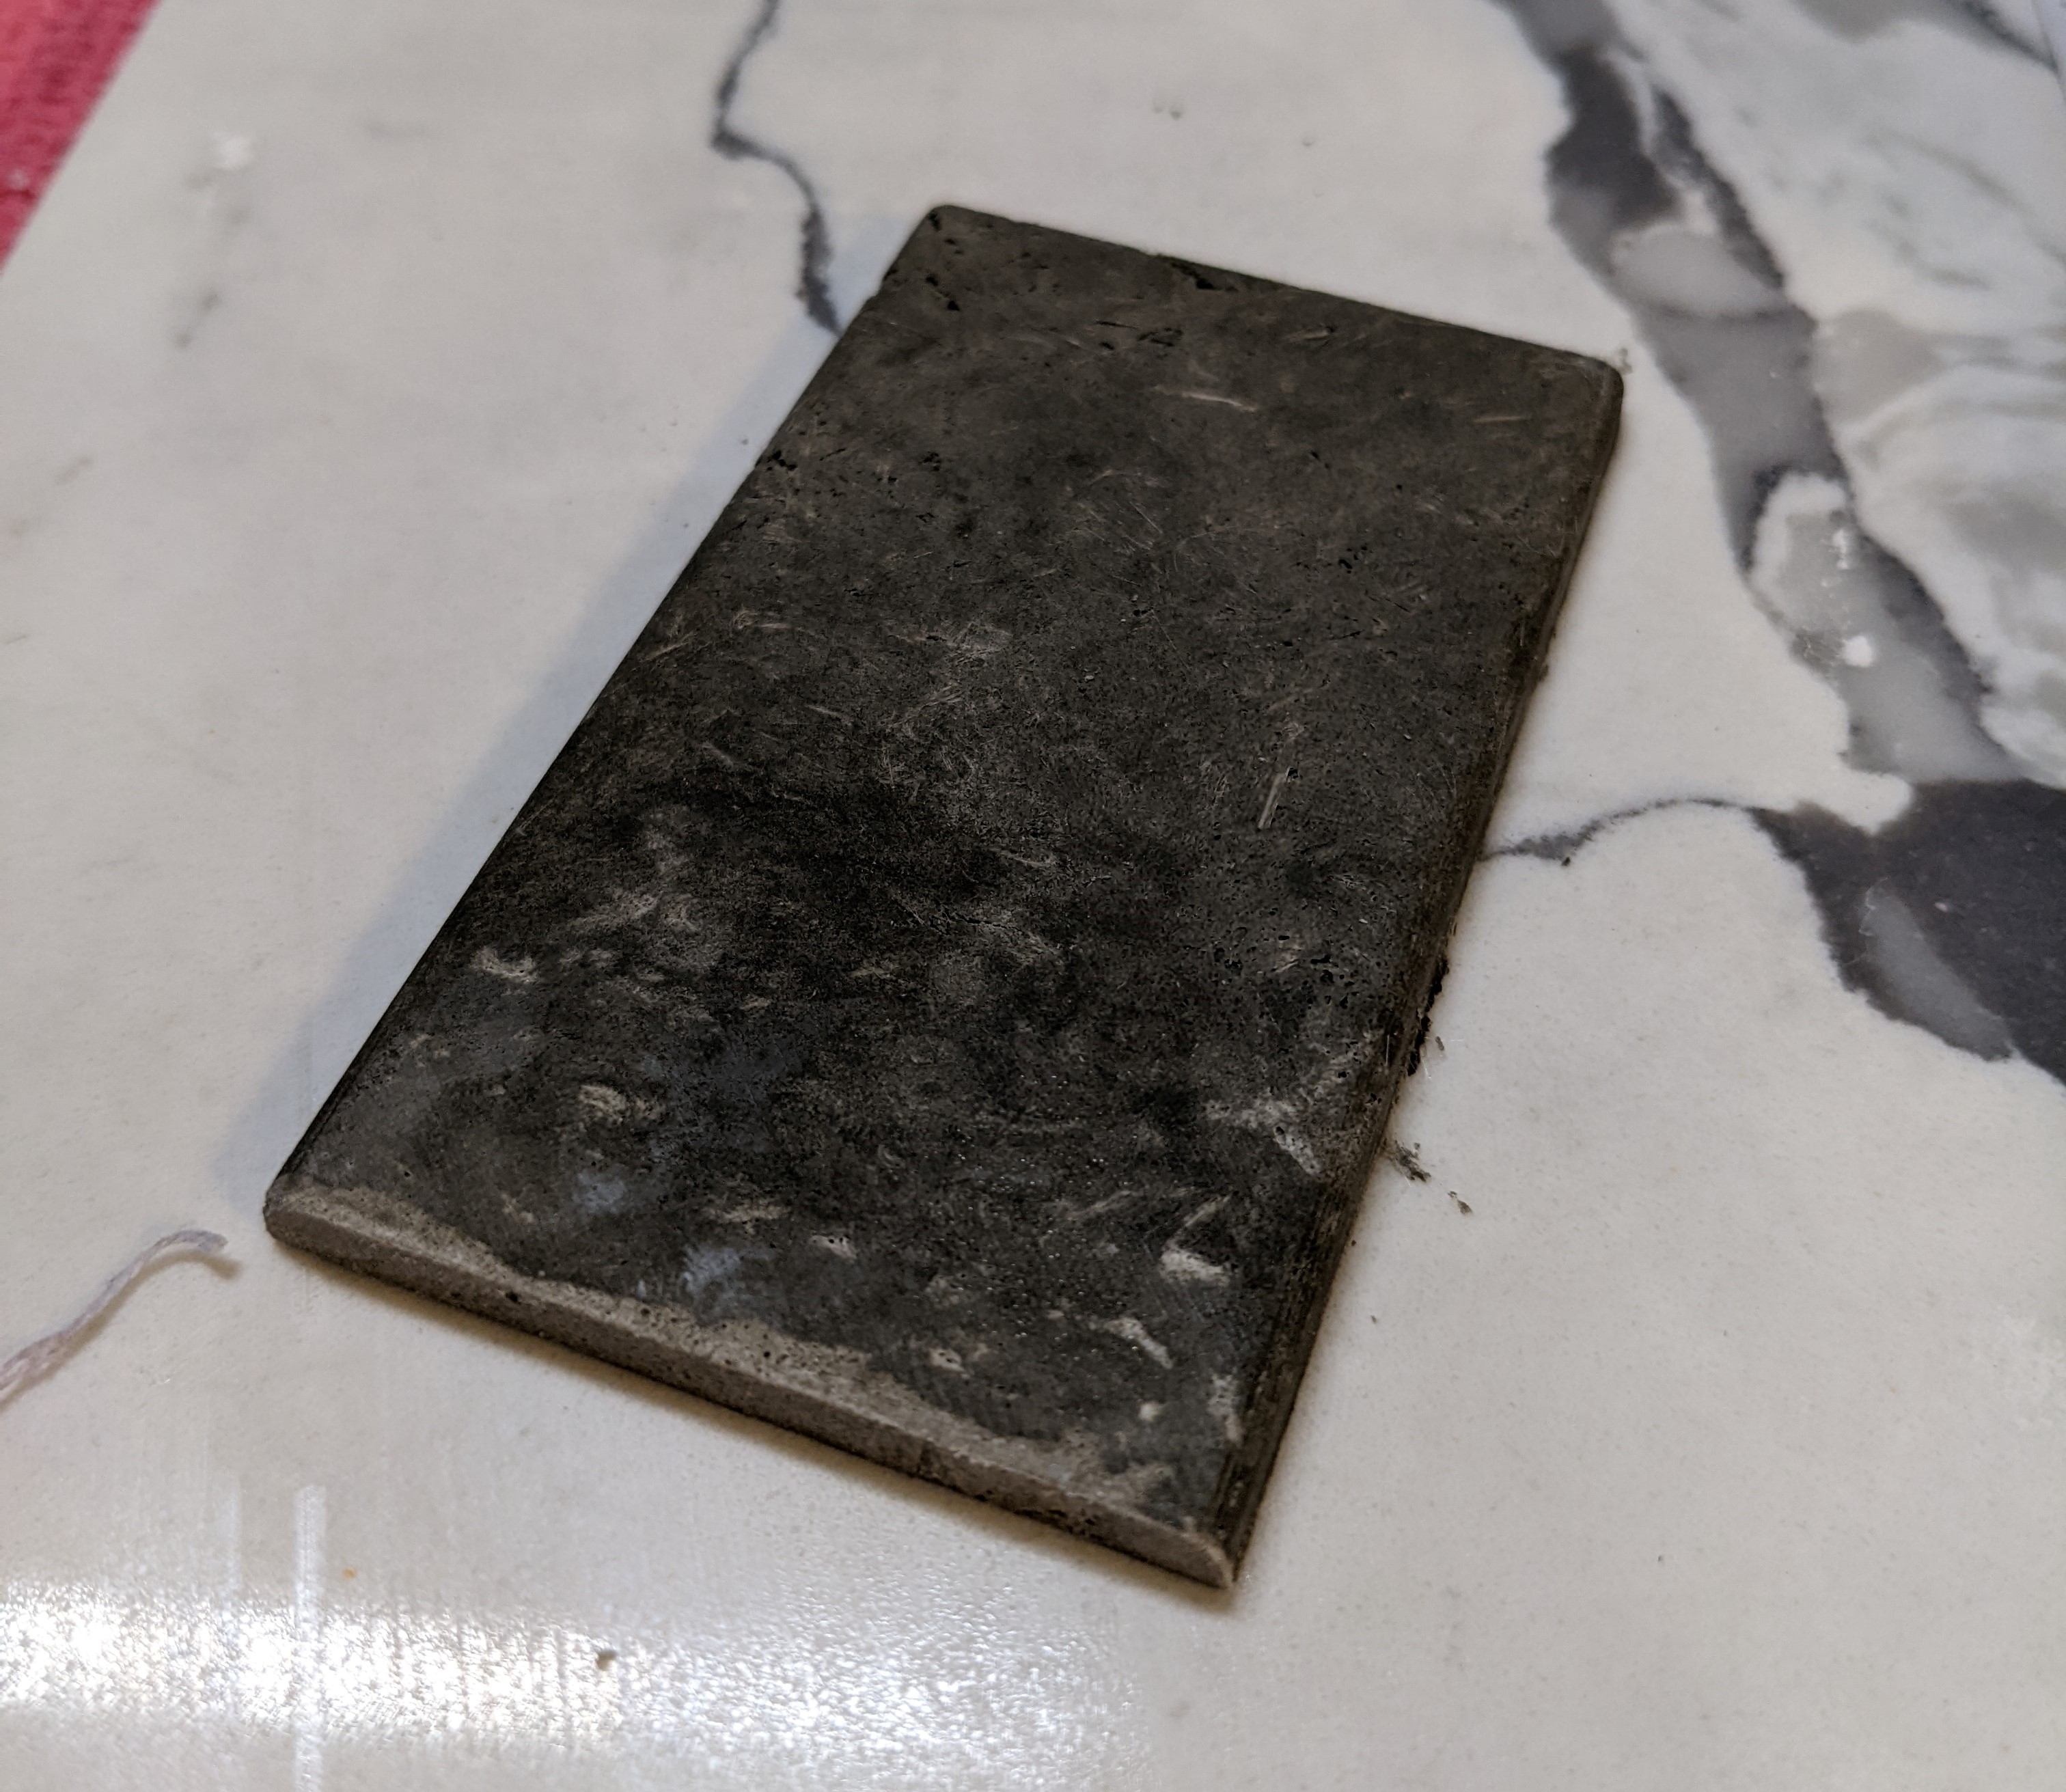
One of the standardized concrete slabs used for testing fresh out of the mold.
Set Backs
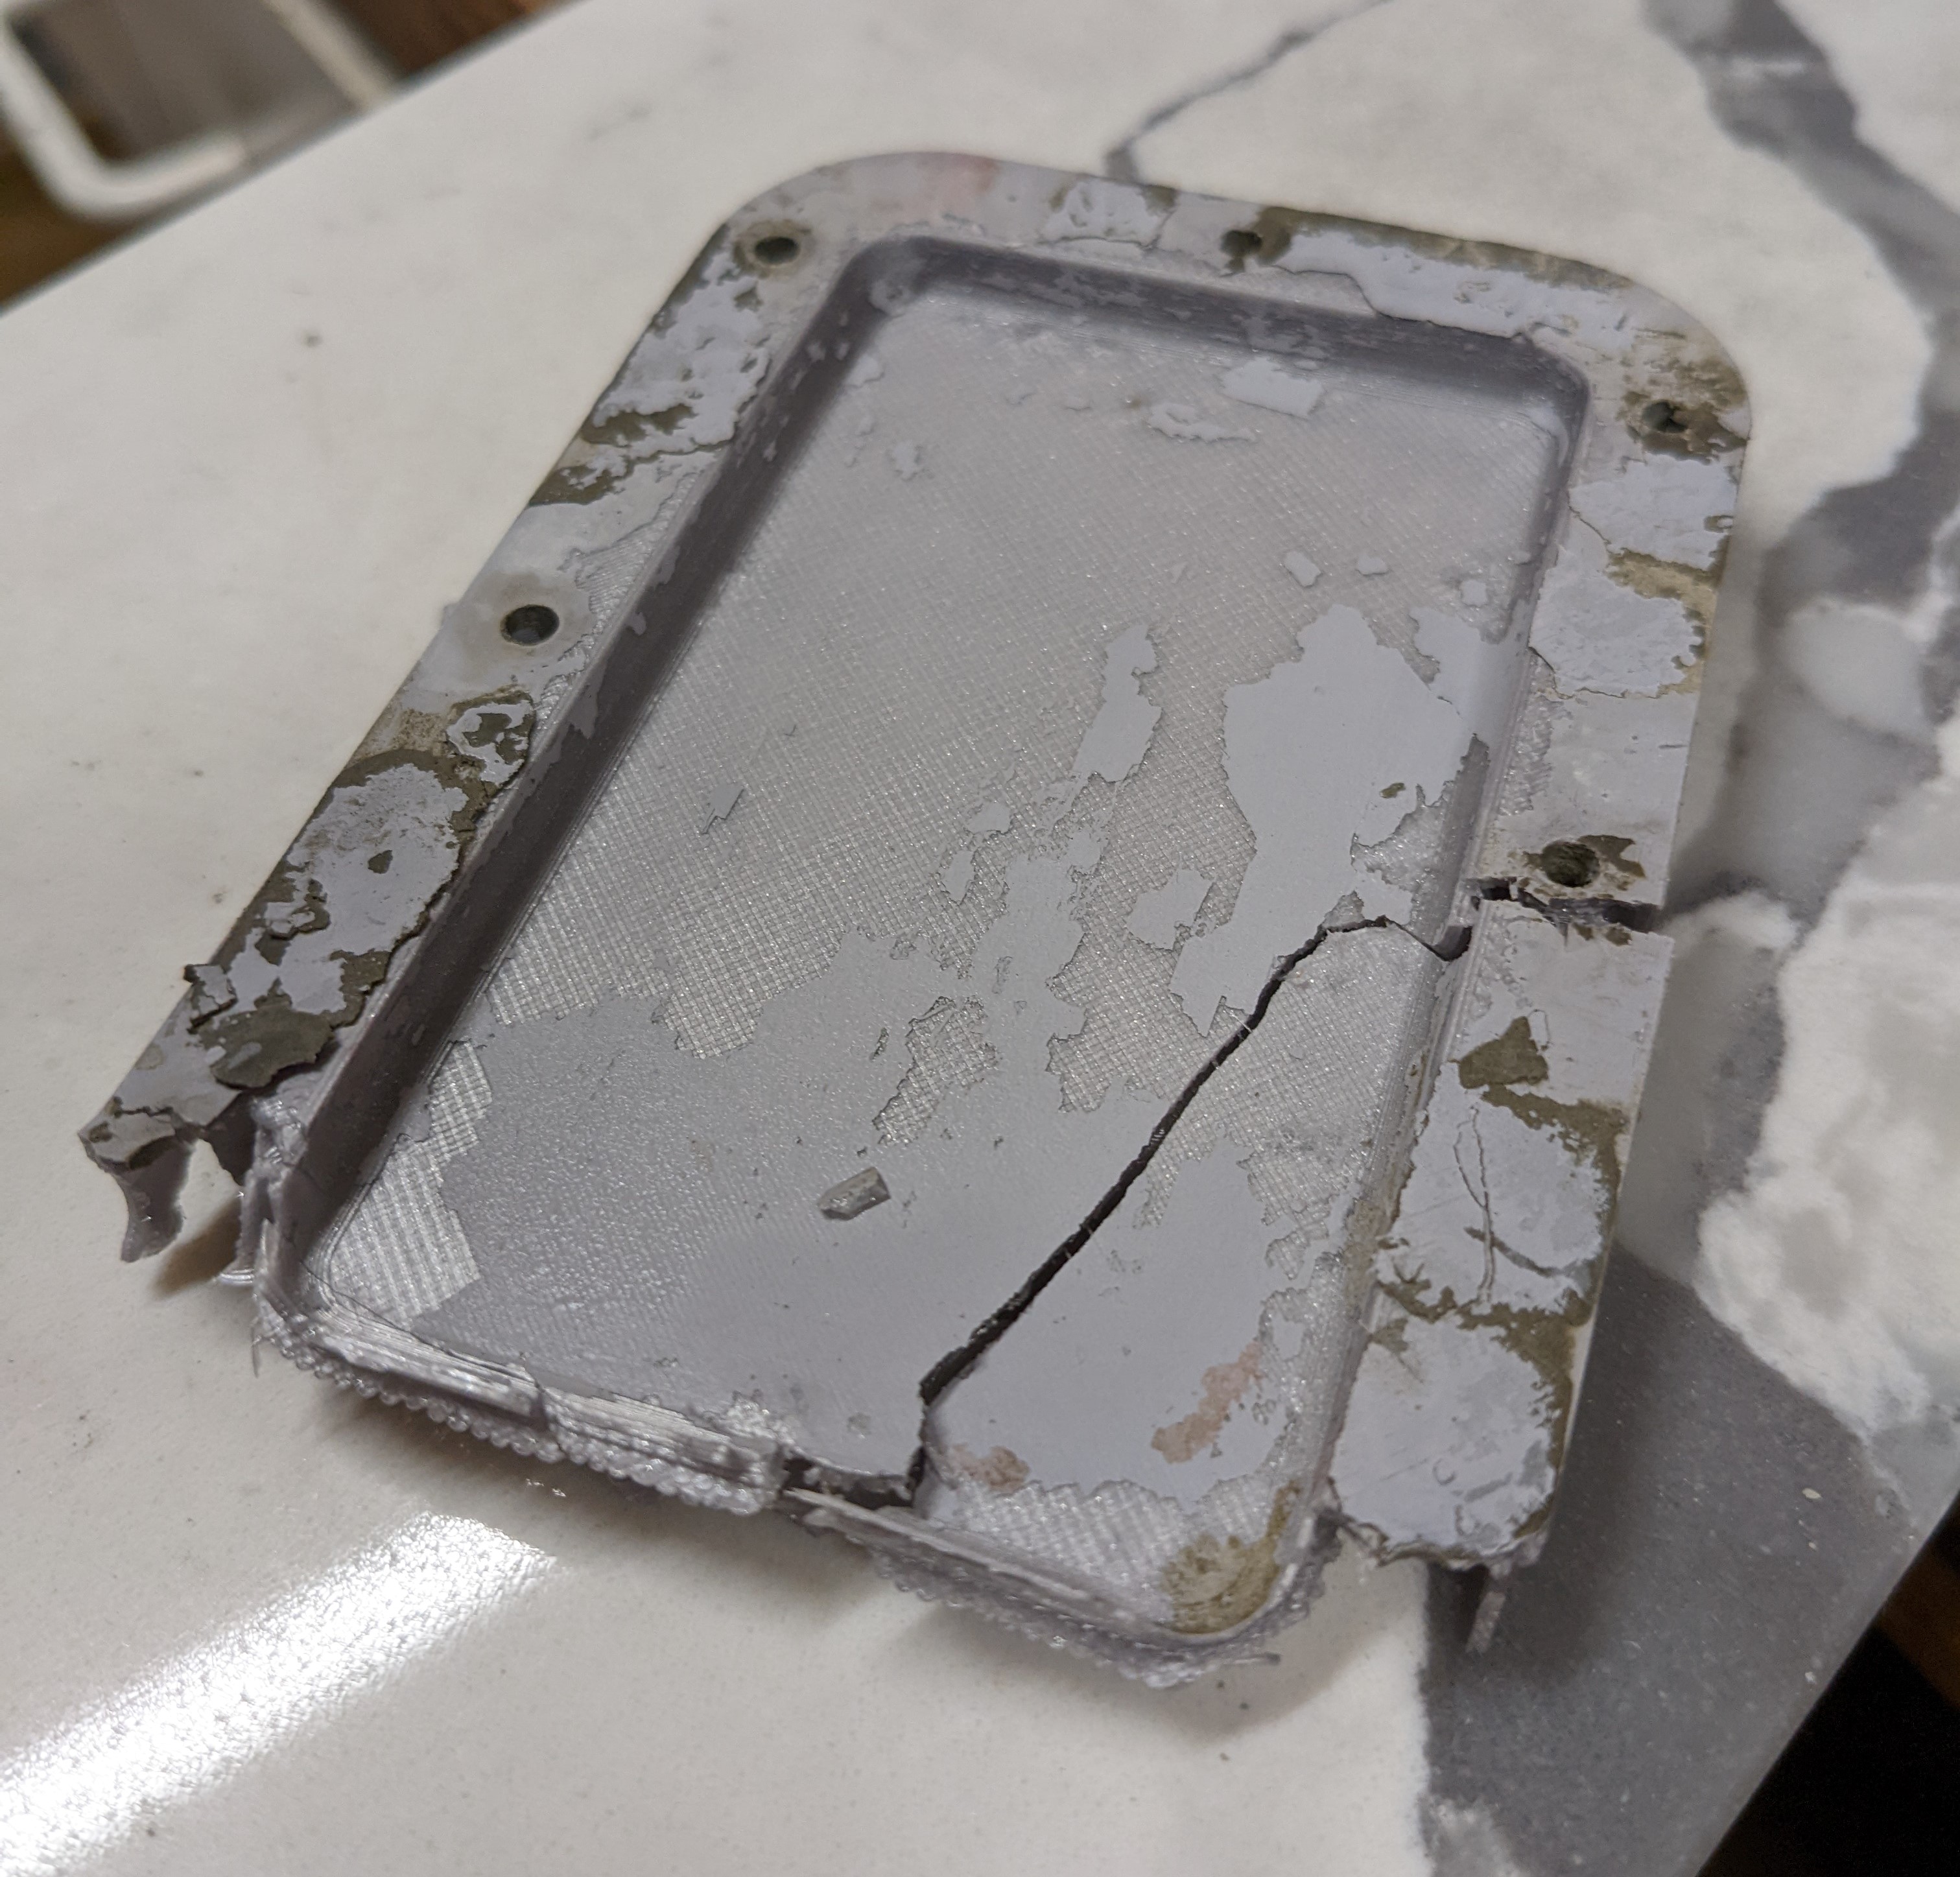
I quickly discovered that the PLA that the molds were printed in were not compatible with the concrete mixture. I talked to two civil engineering professors at my university and they helped me diagnose my issue.
The calcium hydroxide in the concrete was breaking down the PLA plastic and disintegrating the molds. The solution was to seal the plastic molds using a polyurethane spray. This solved the disintegration issue for all further tests.
Documentation
Over the course of the semester, I maintained highly detailed documentation. This helped me keep track of several tests and designs being processed at once, and it let me put all of my thoughts of the day's work onto paper.
Molds
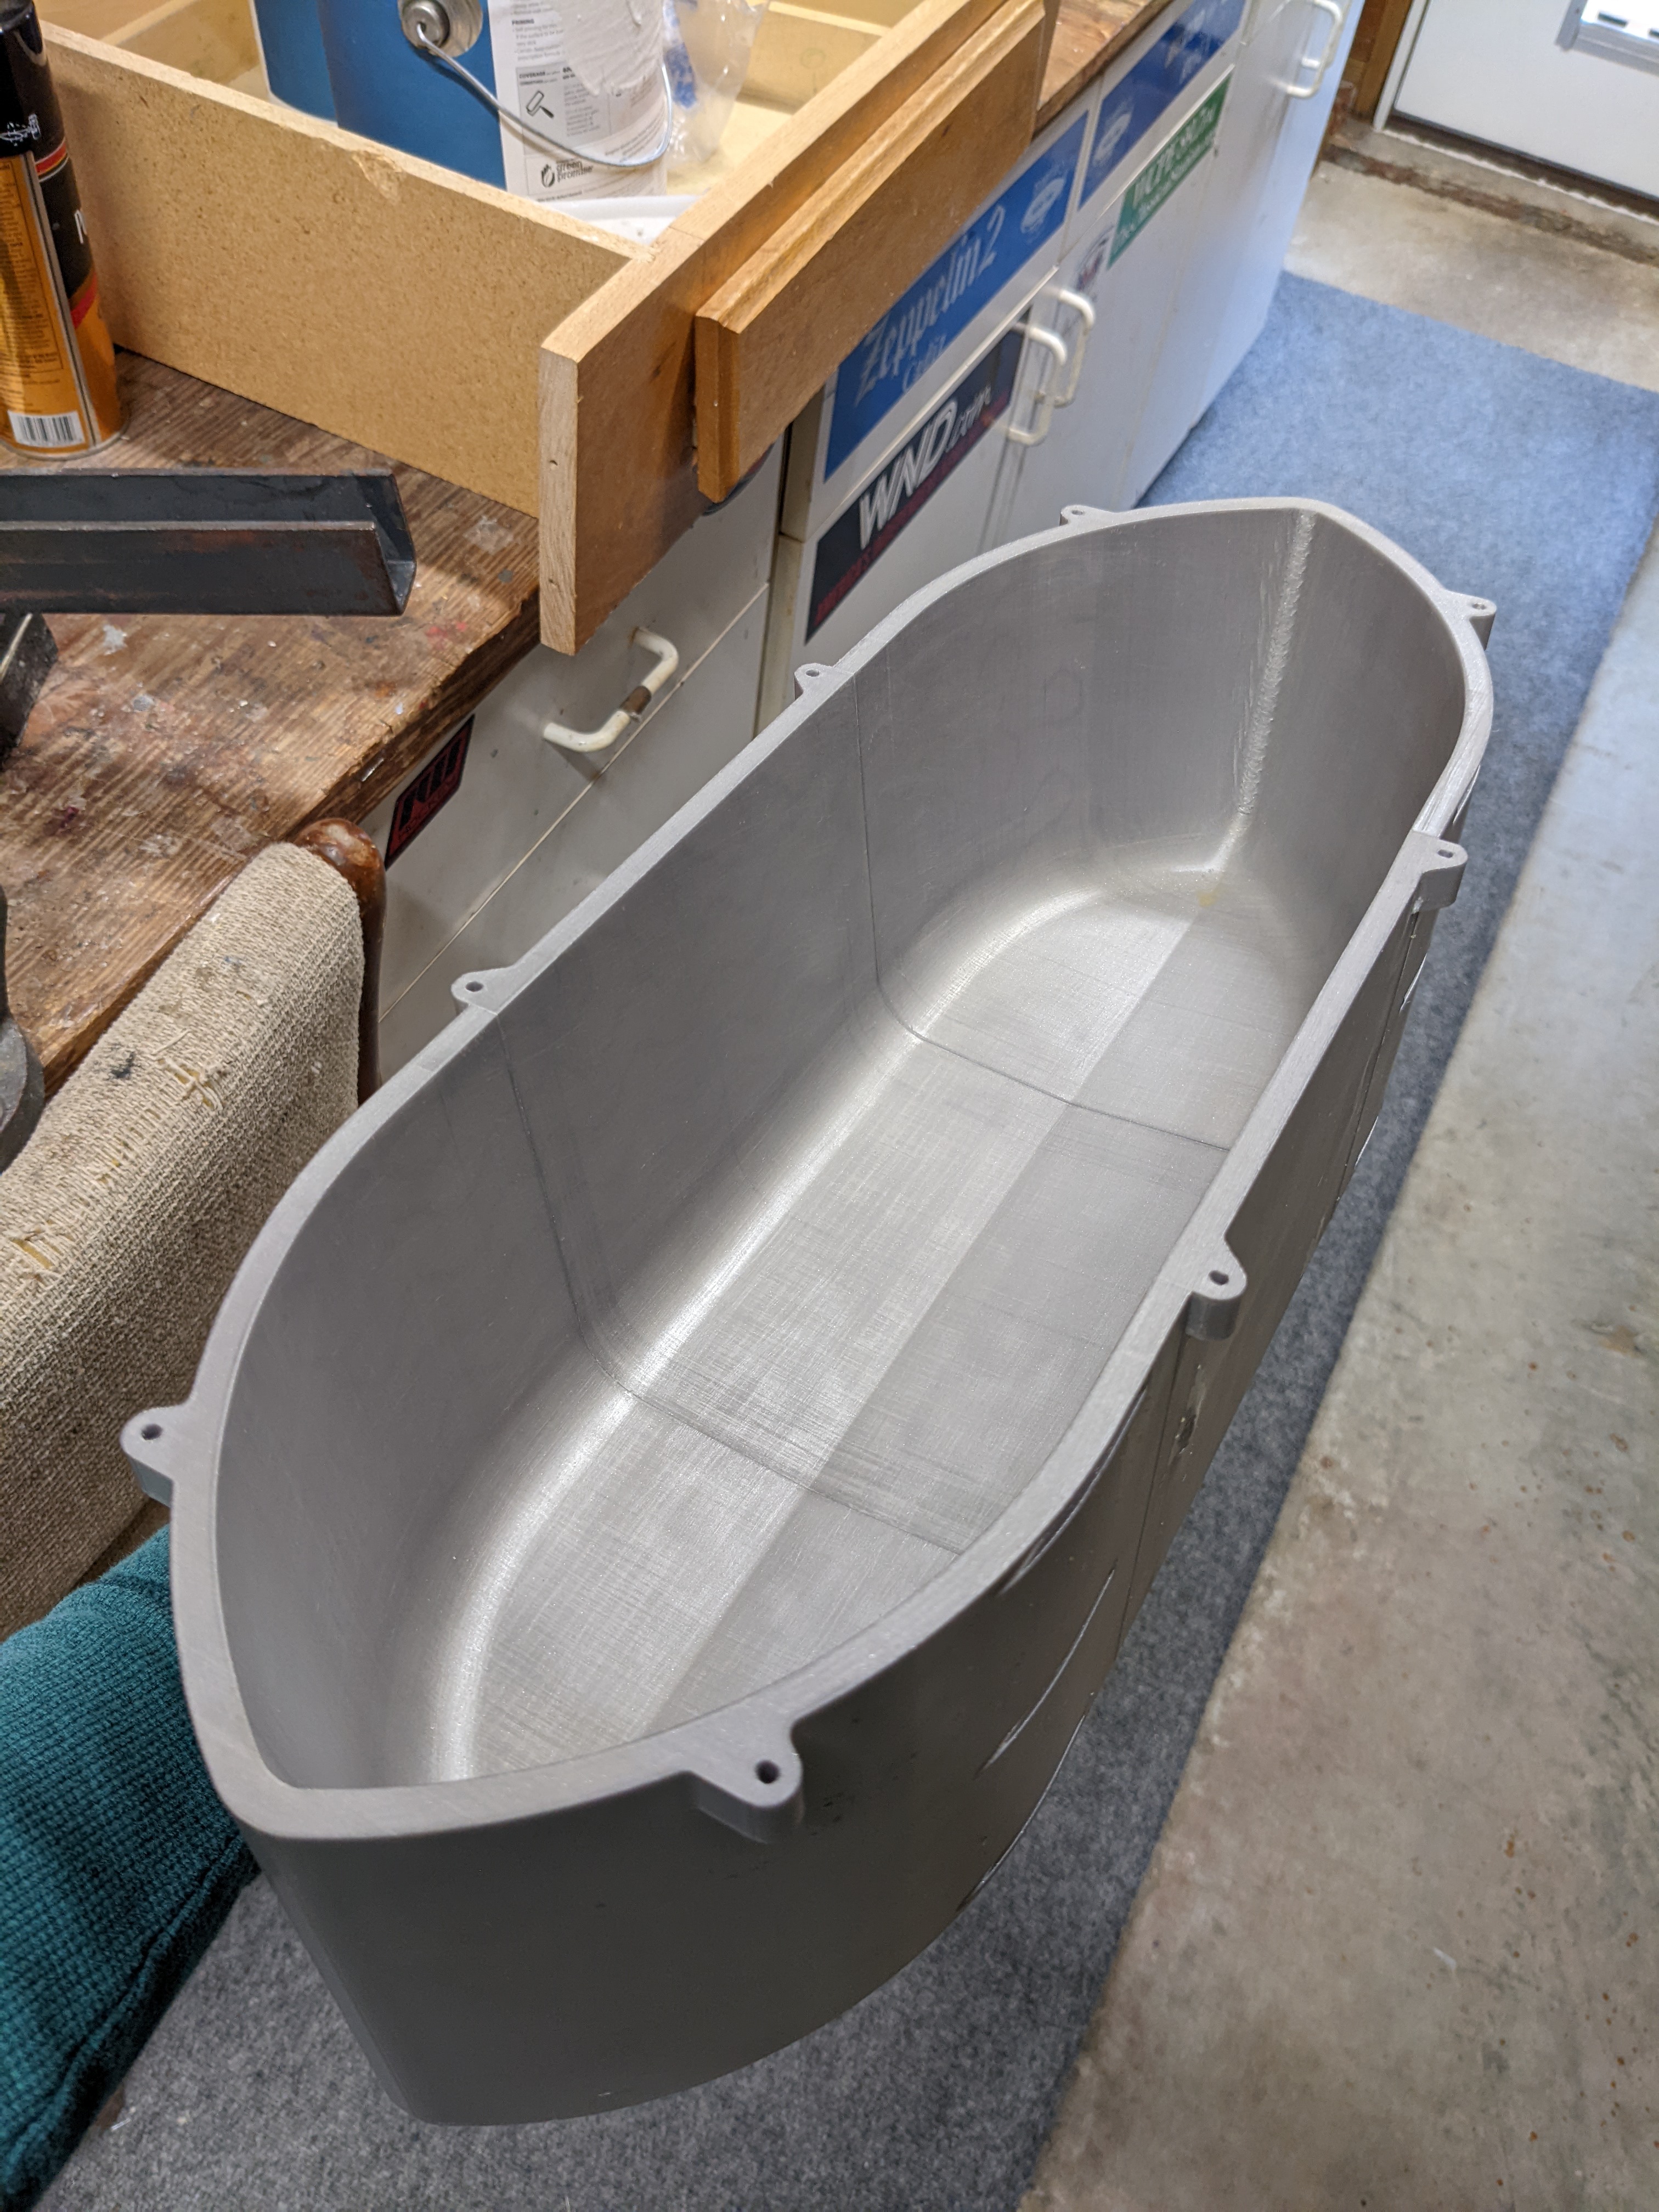
Once I was satisified with all test results and procedures, I moved onto 3D printing the final molds. Pictured here is the cavity mold which defines the external geometry of the canoe.
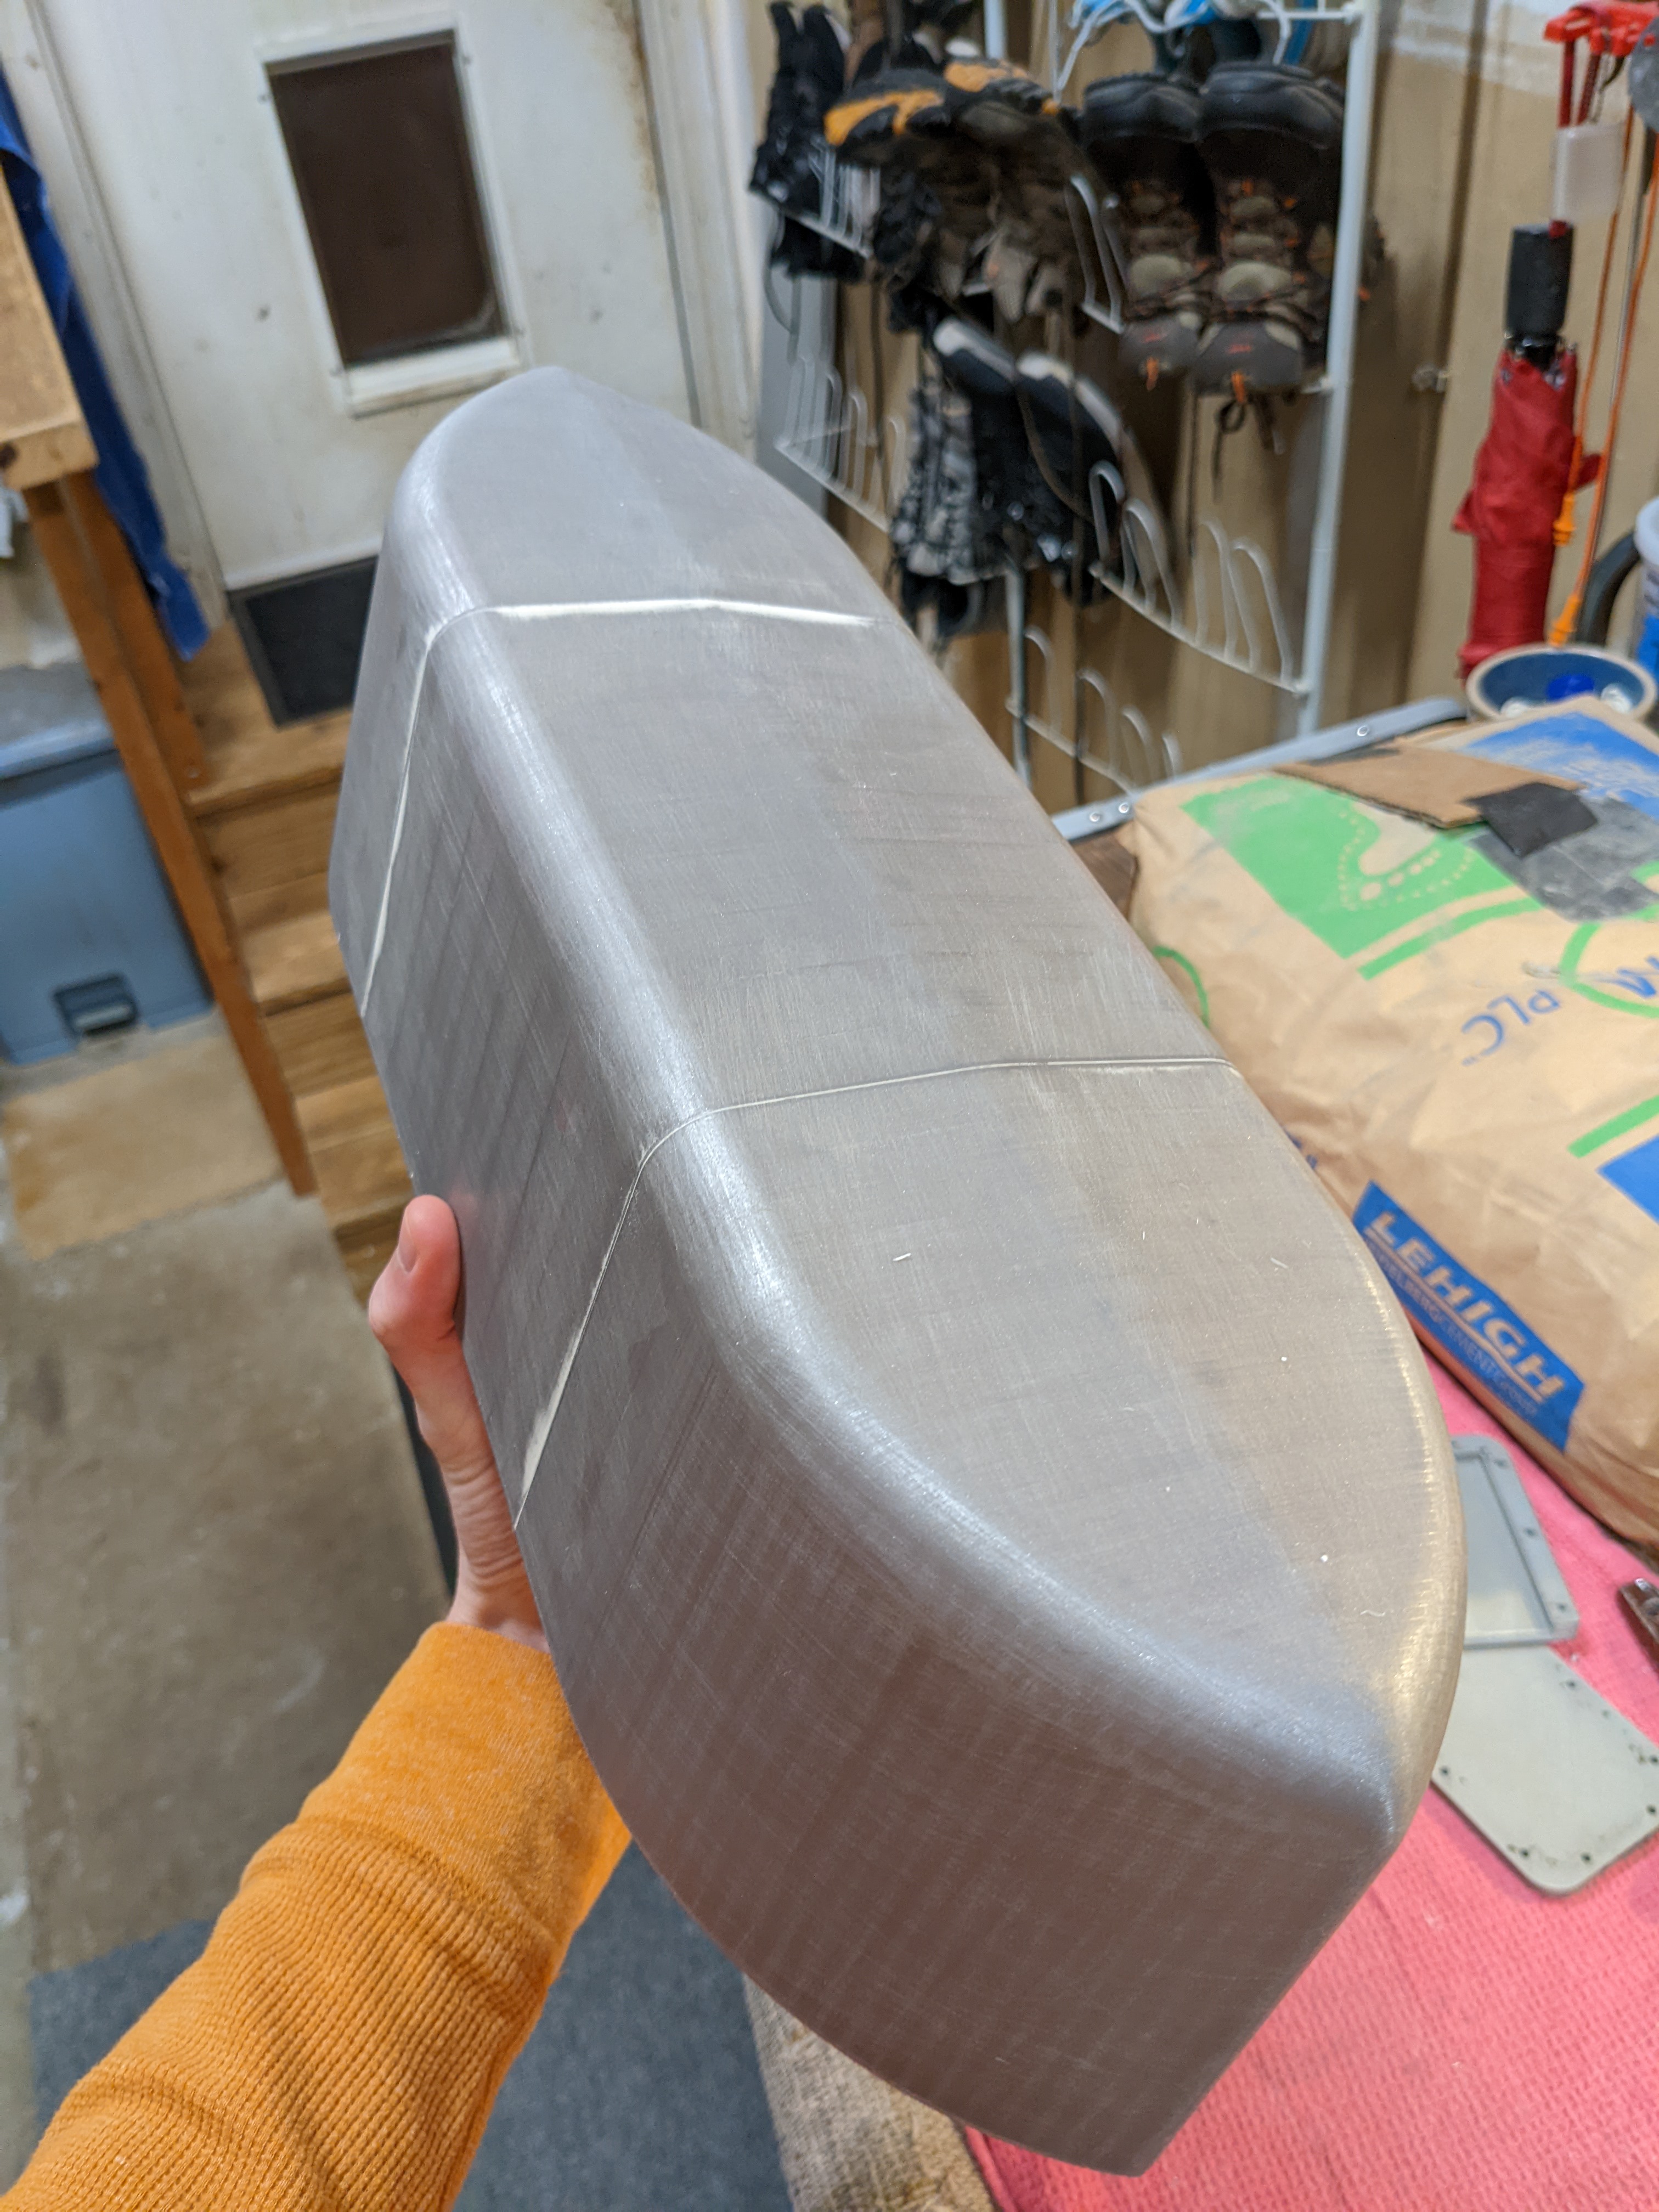
This is the core mold which defines the internal geometry of the canoe. These molds were processed heavily, first sanding them up to 600 grit, spraying them with polyurethane, wet sanding up to 1500 grit, then applying four layers of mold release wax and finally a layer of canola oil.
More Set Backs
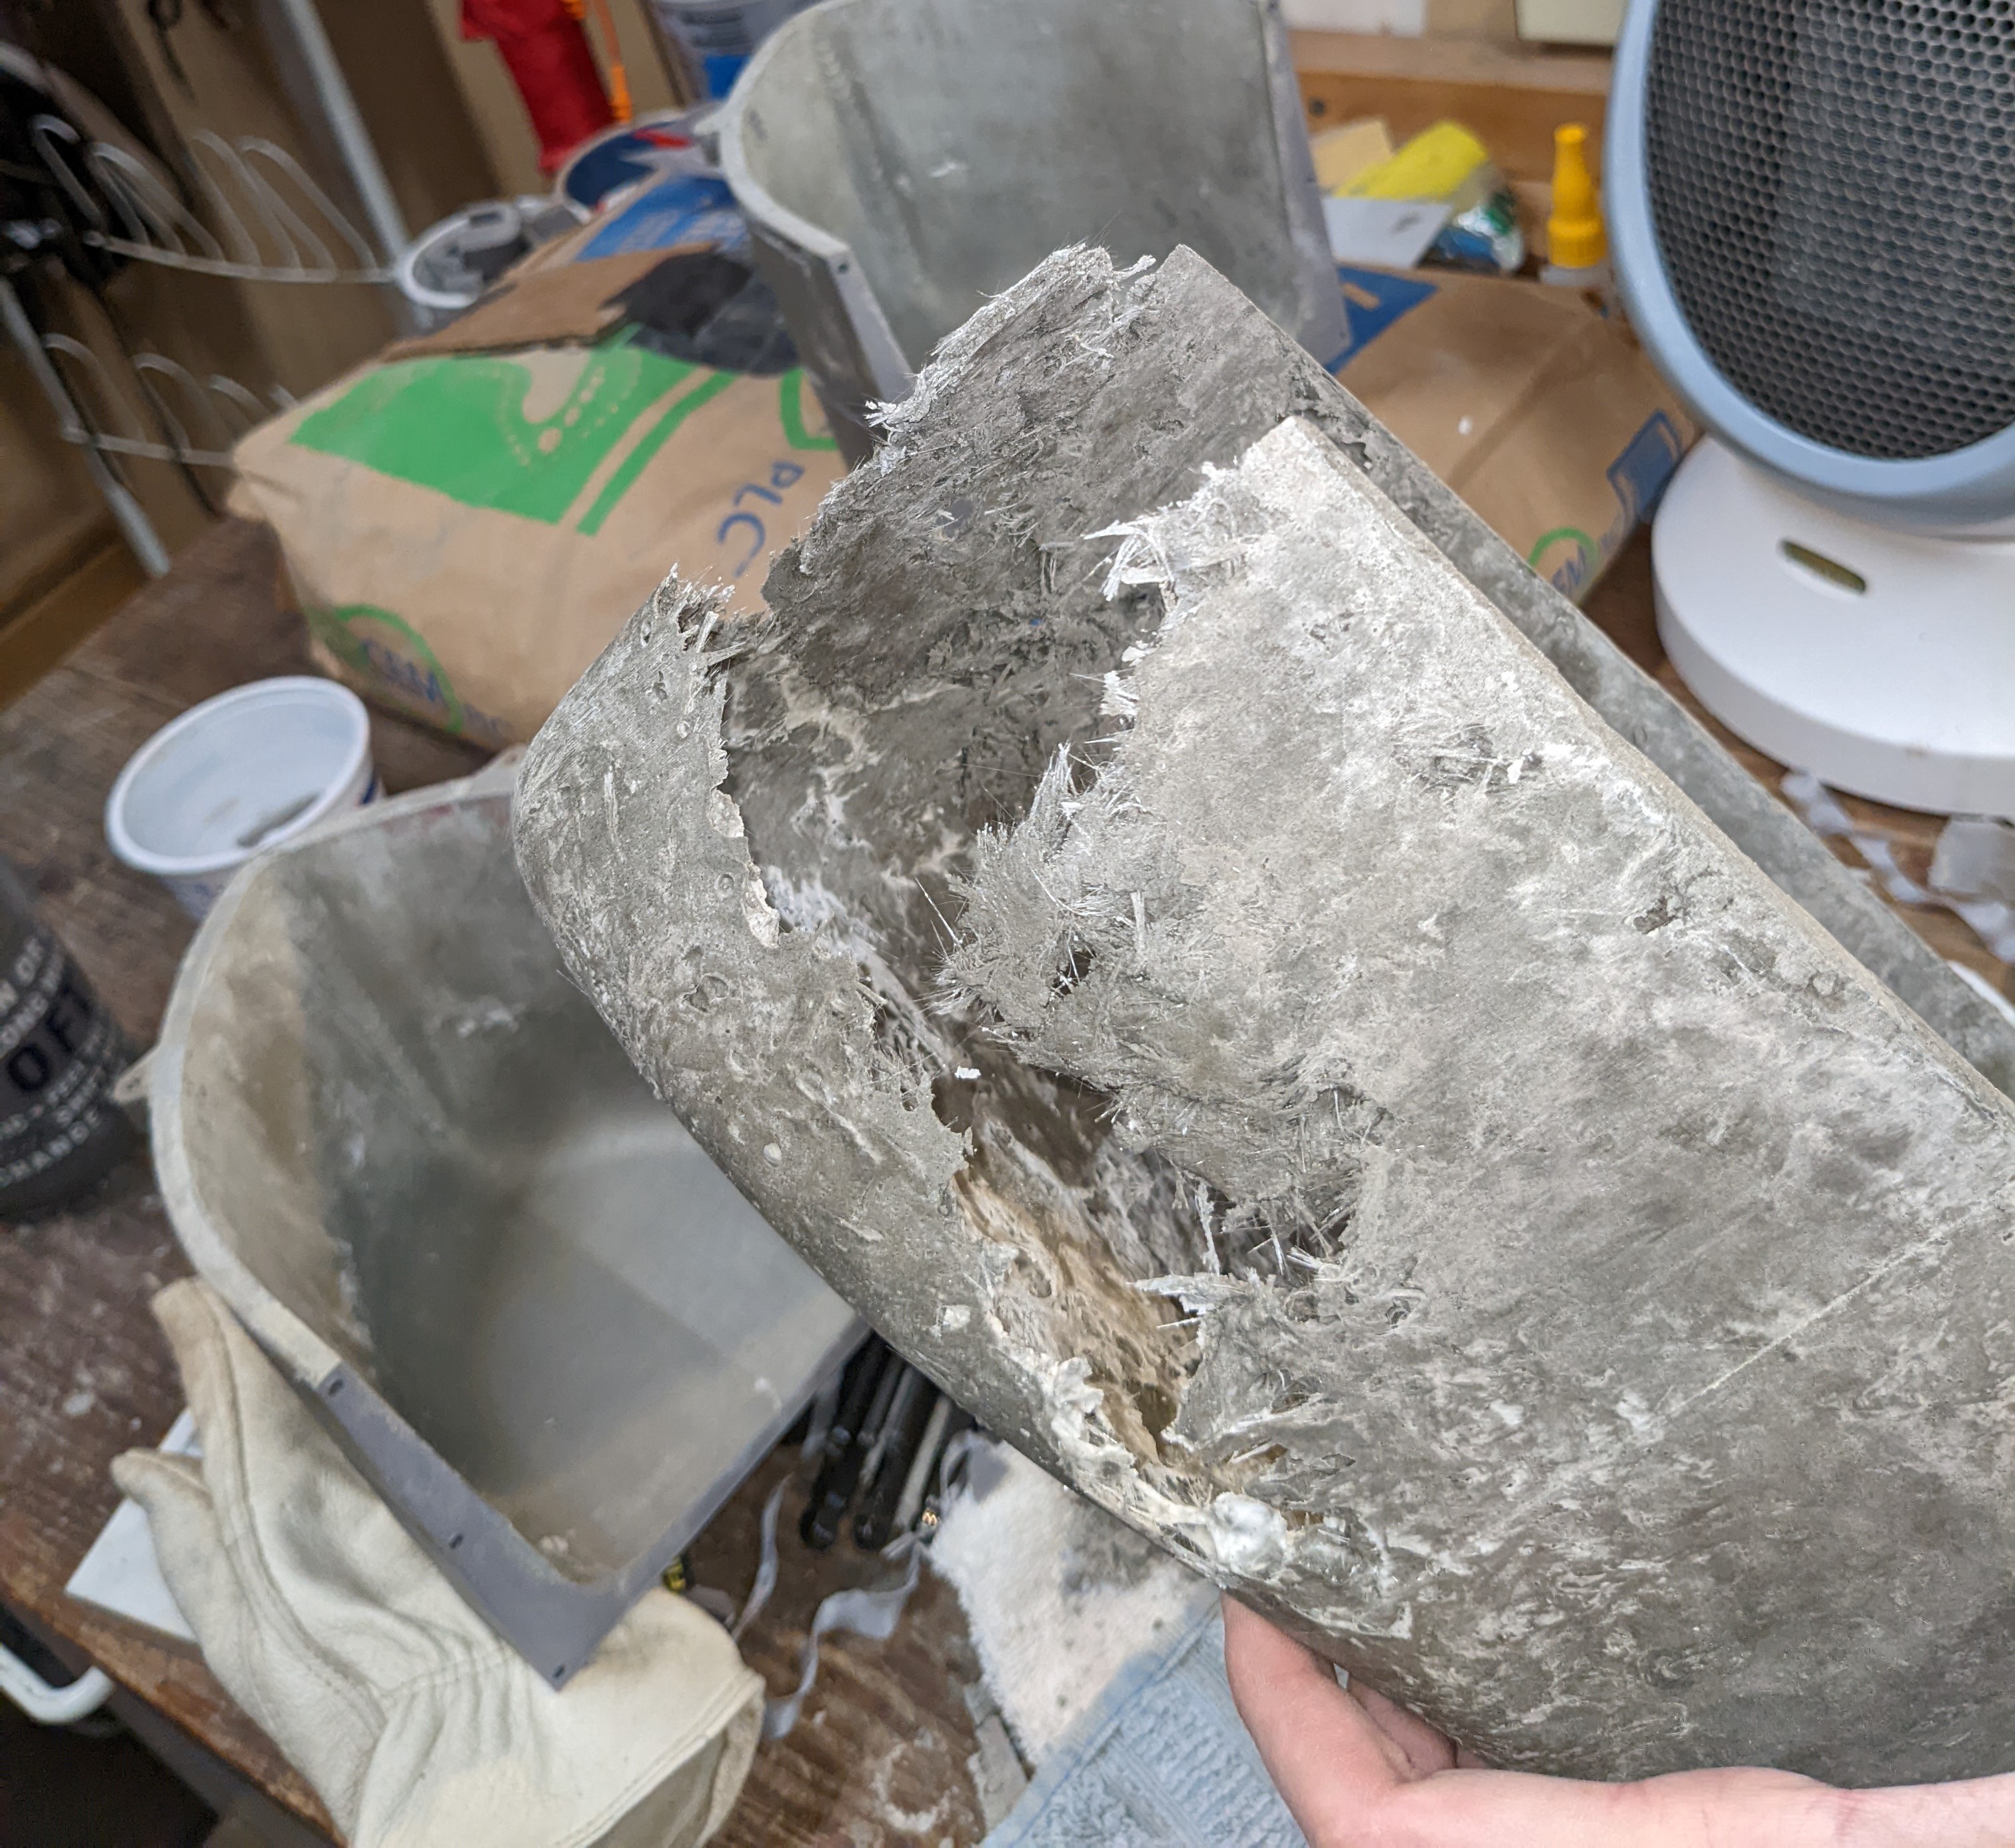
Attempting to mold the final boat was very difficult. Since the gap between the molds was only 5 mm, I was struggling to get concrete in all locations. Additionally, the pressure of the concrete was warping the cavity mold outwards near the center, making the gap near the ends very small.
After approximately 2 hours, I had to stop molding as the concrete was curing. I was aware I left a massive hole in one of the ends, pictured on the left here. After 2 days, I demolded the boat. I decided it was recoverable, so I patched the massive hole with more concrete mix and let it cure.
Final Product
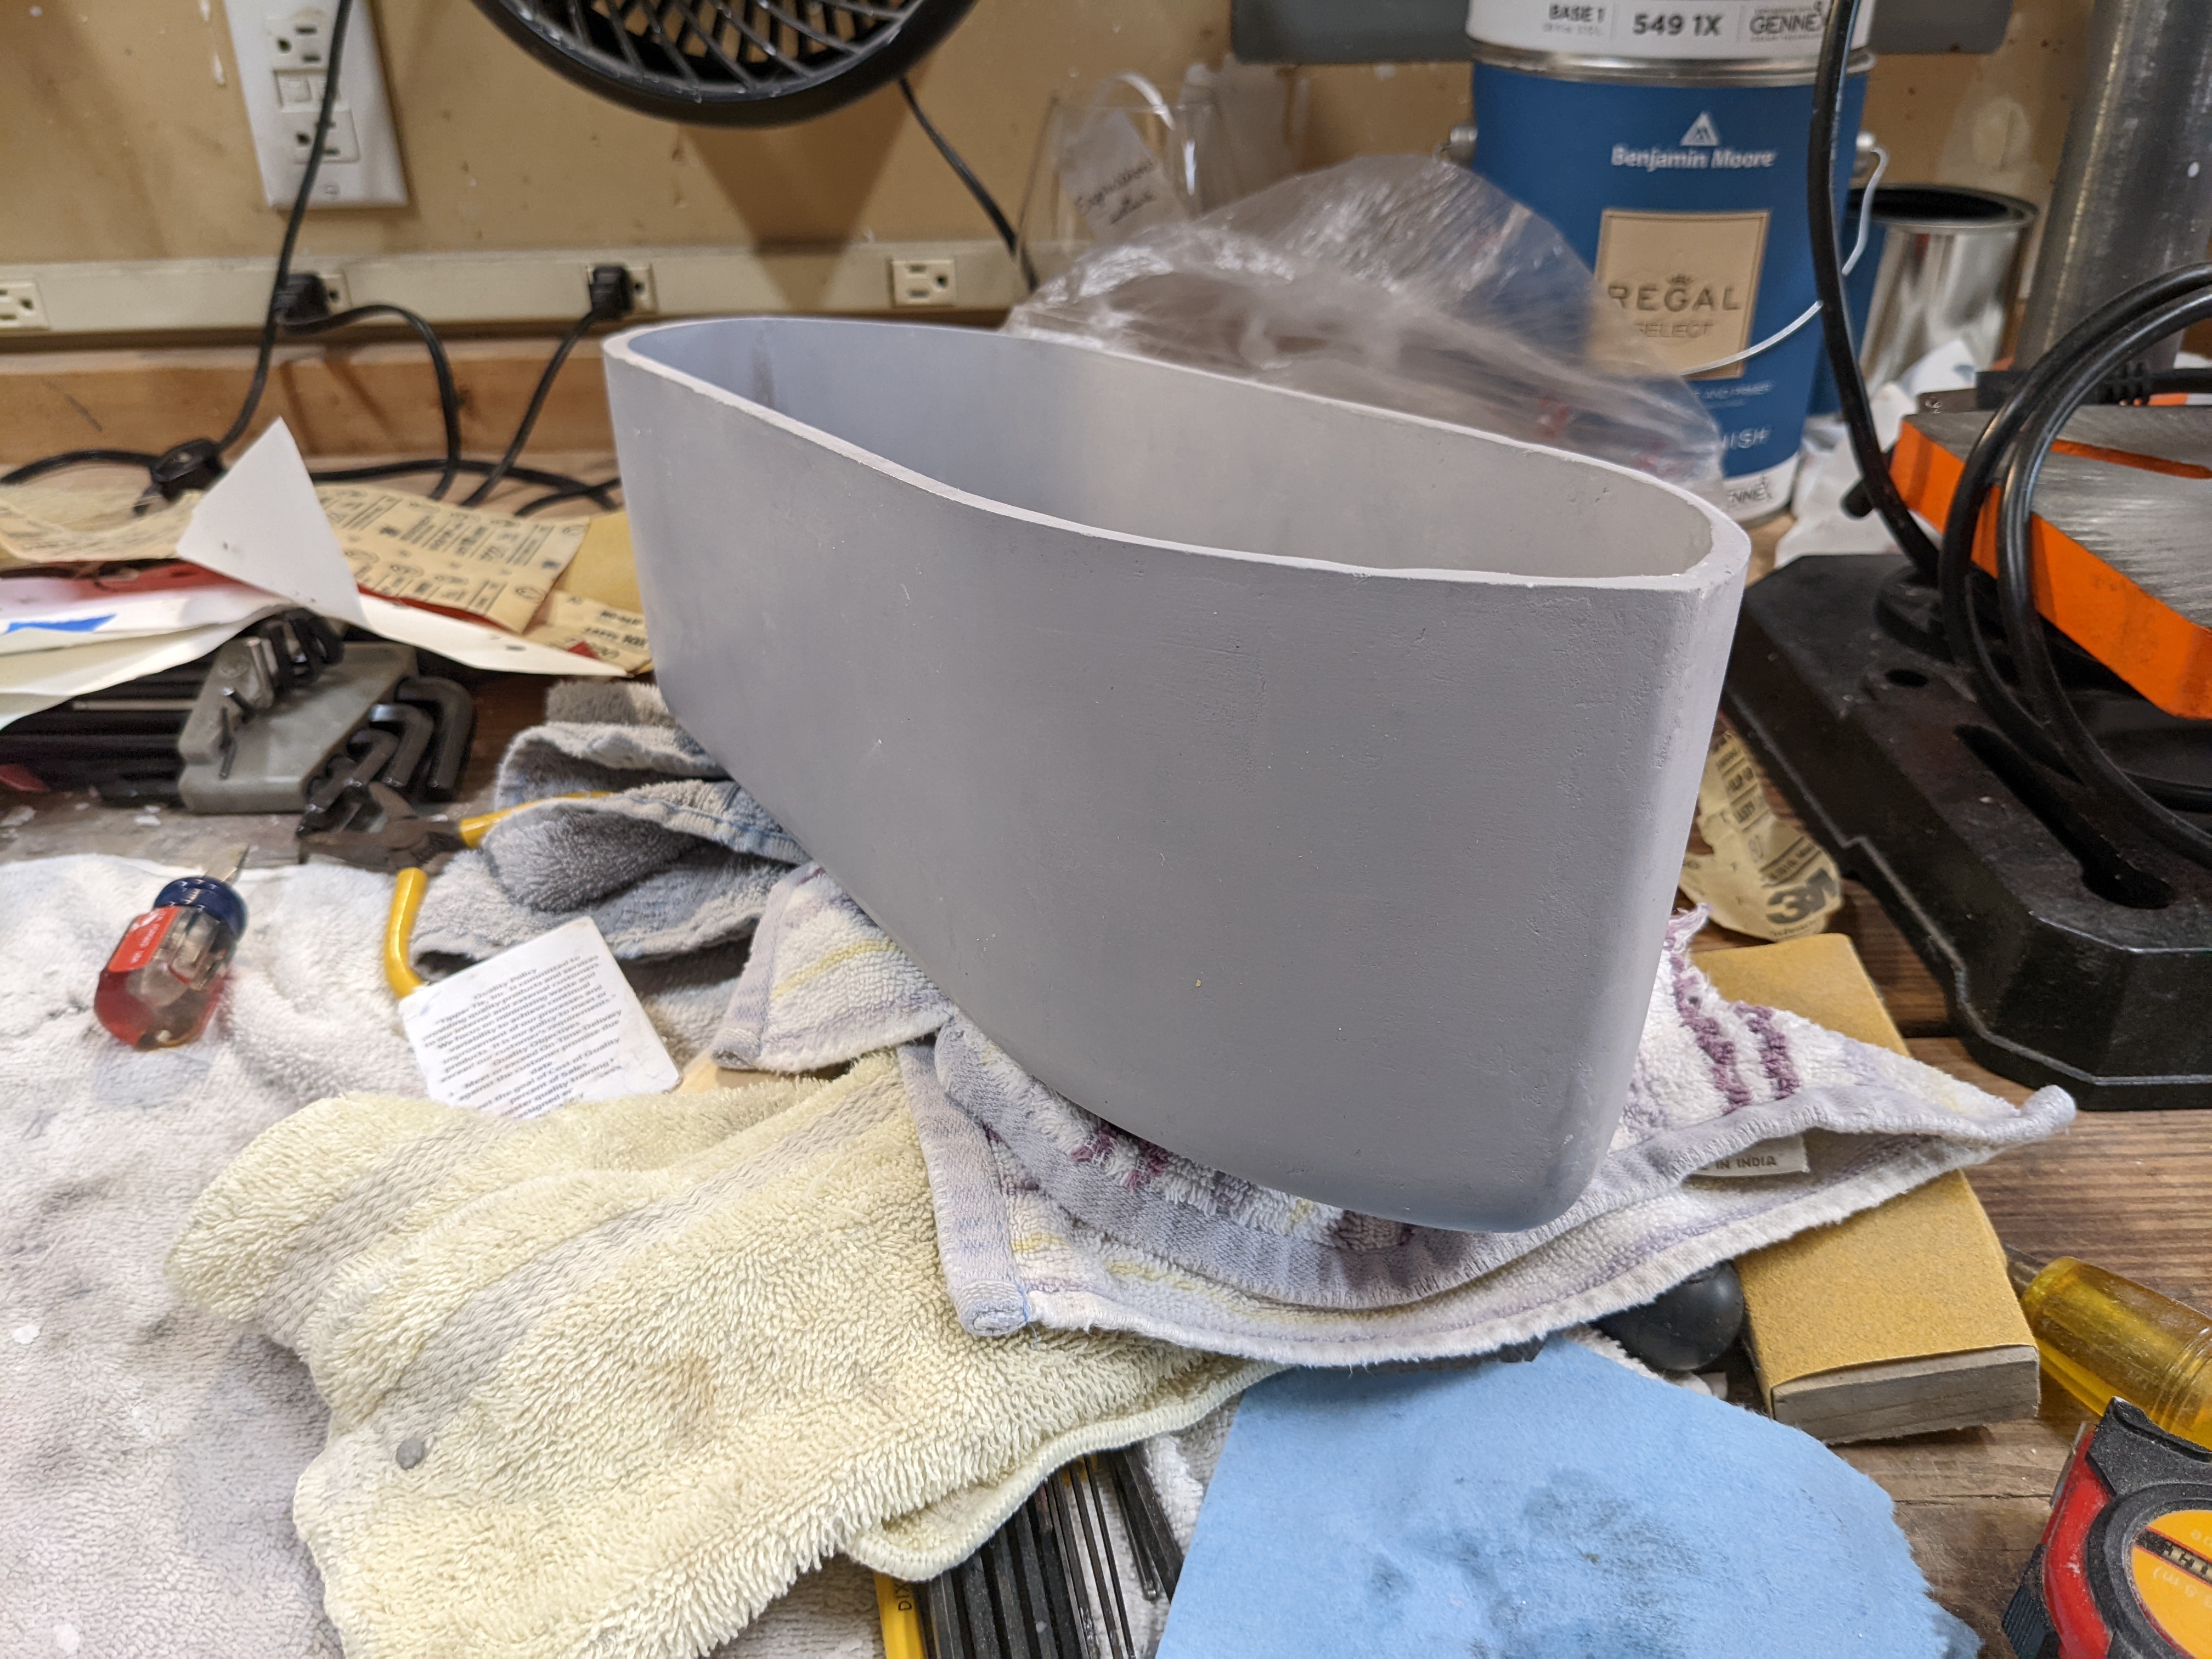
I successfully patched the boat and then spent many hours processing the surface to make sure it was in dimensional specification. This was a painstaking manual process that required extreme patience. The final mass of the canoe was 980 grams, significantly under my aspirational goal of 1.25 kg.
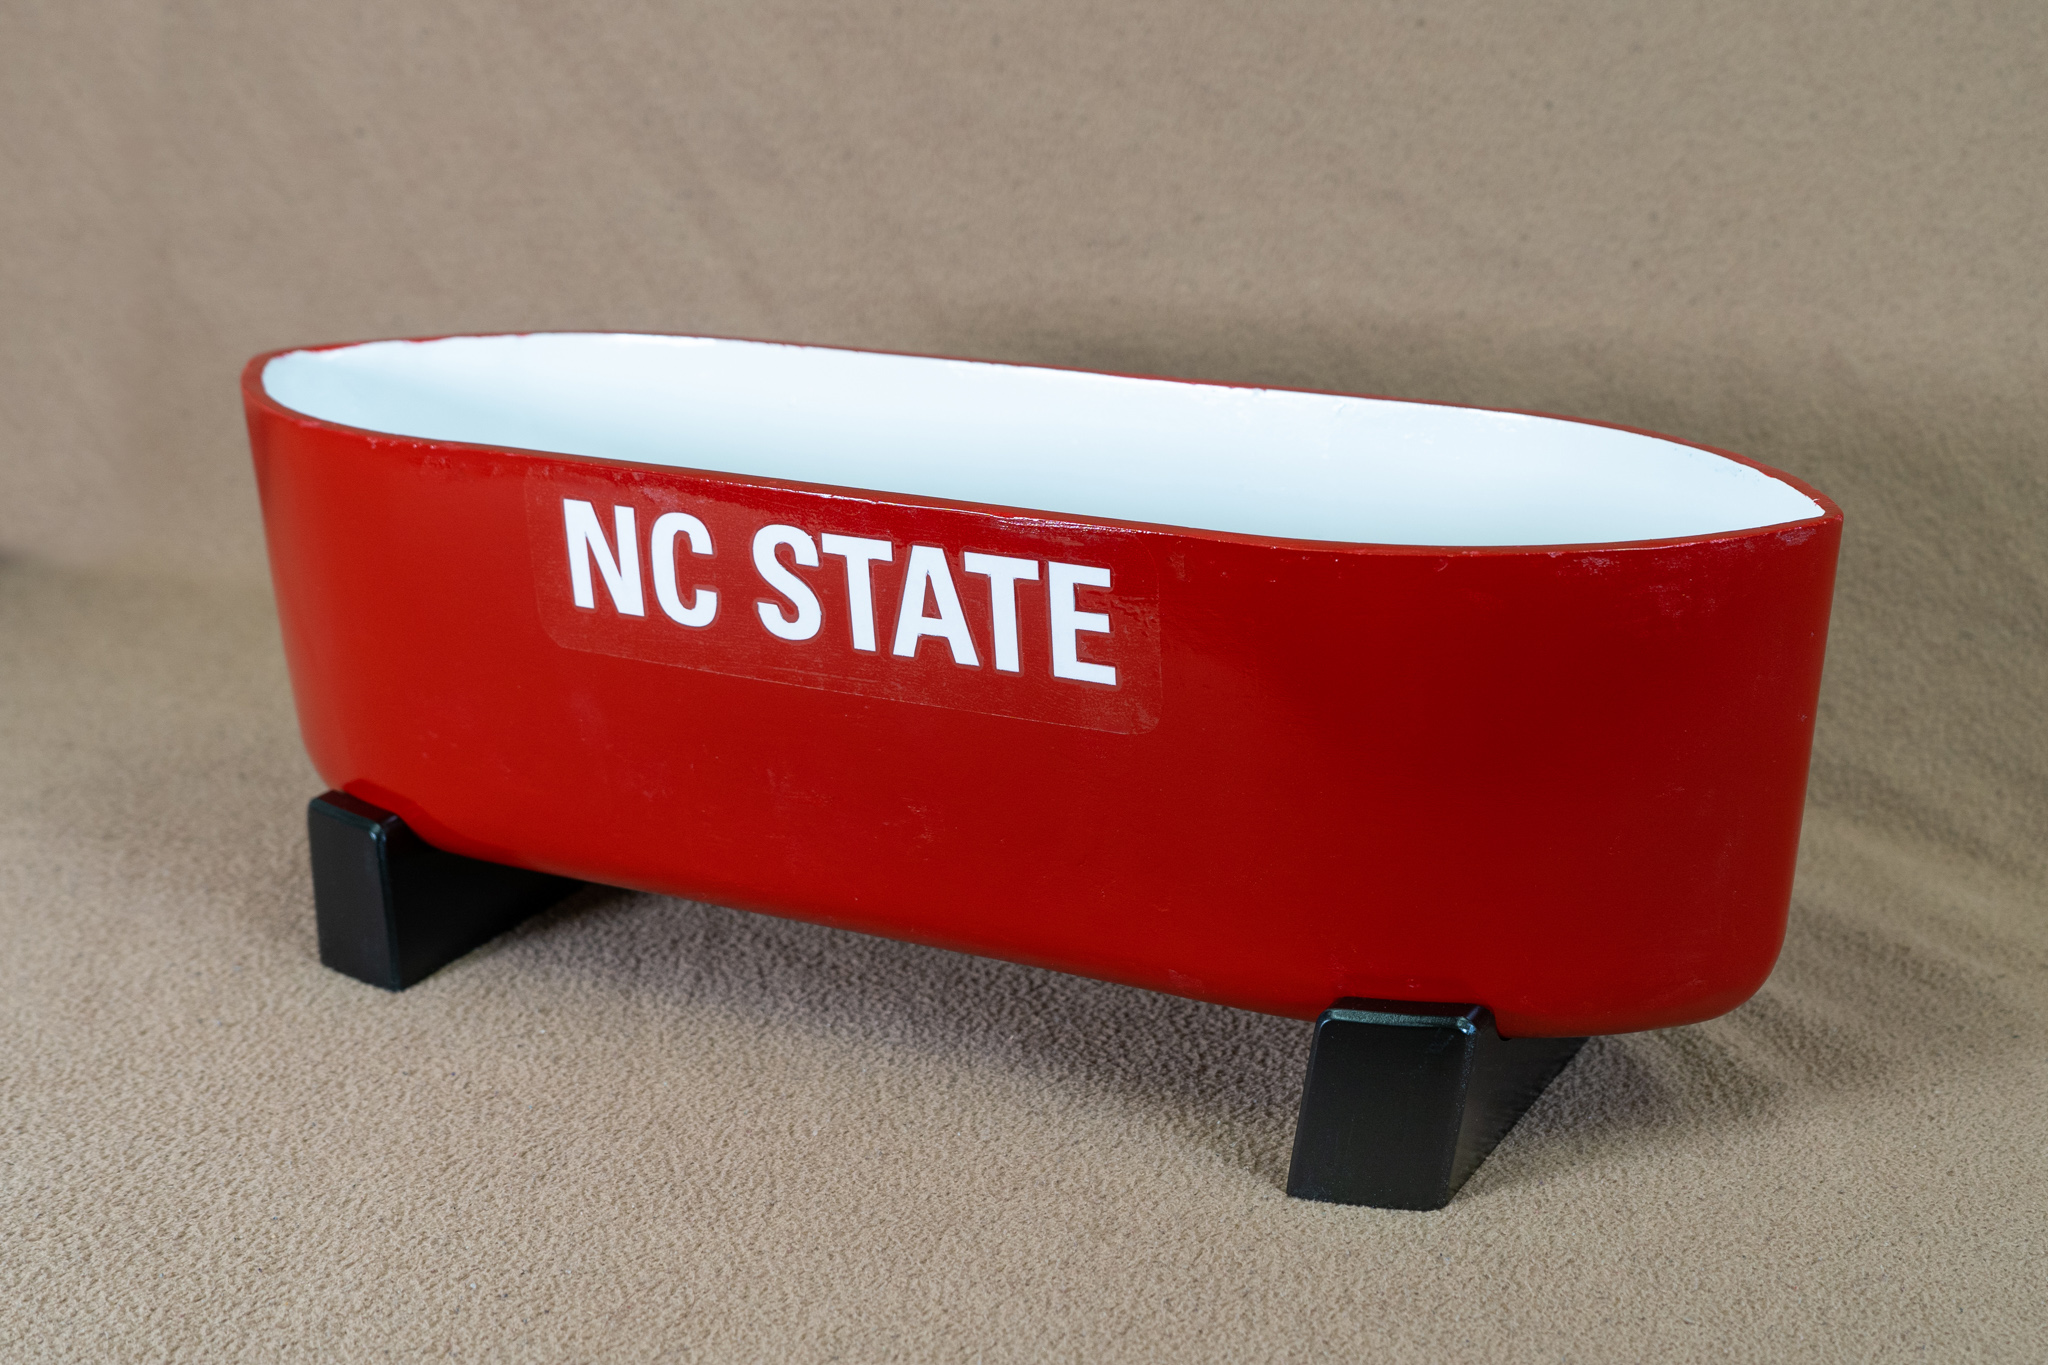
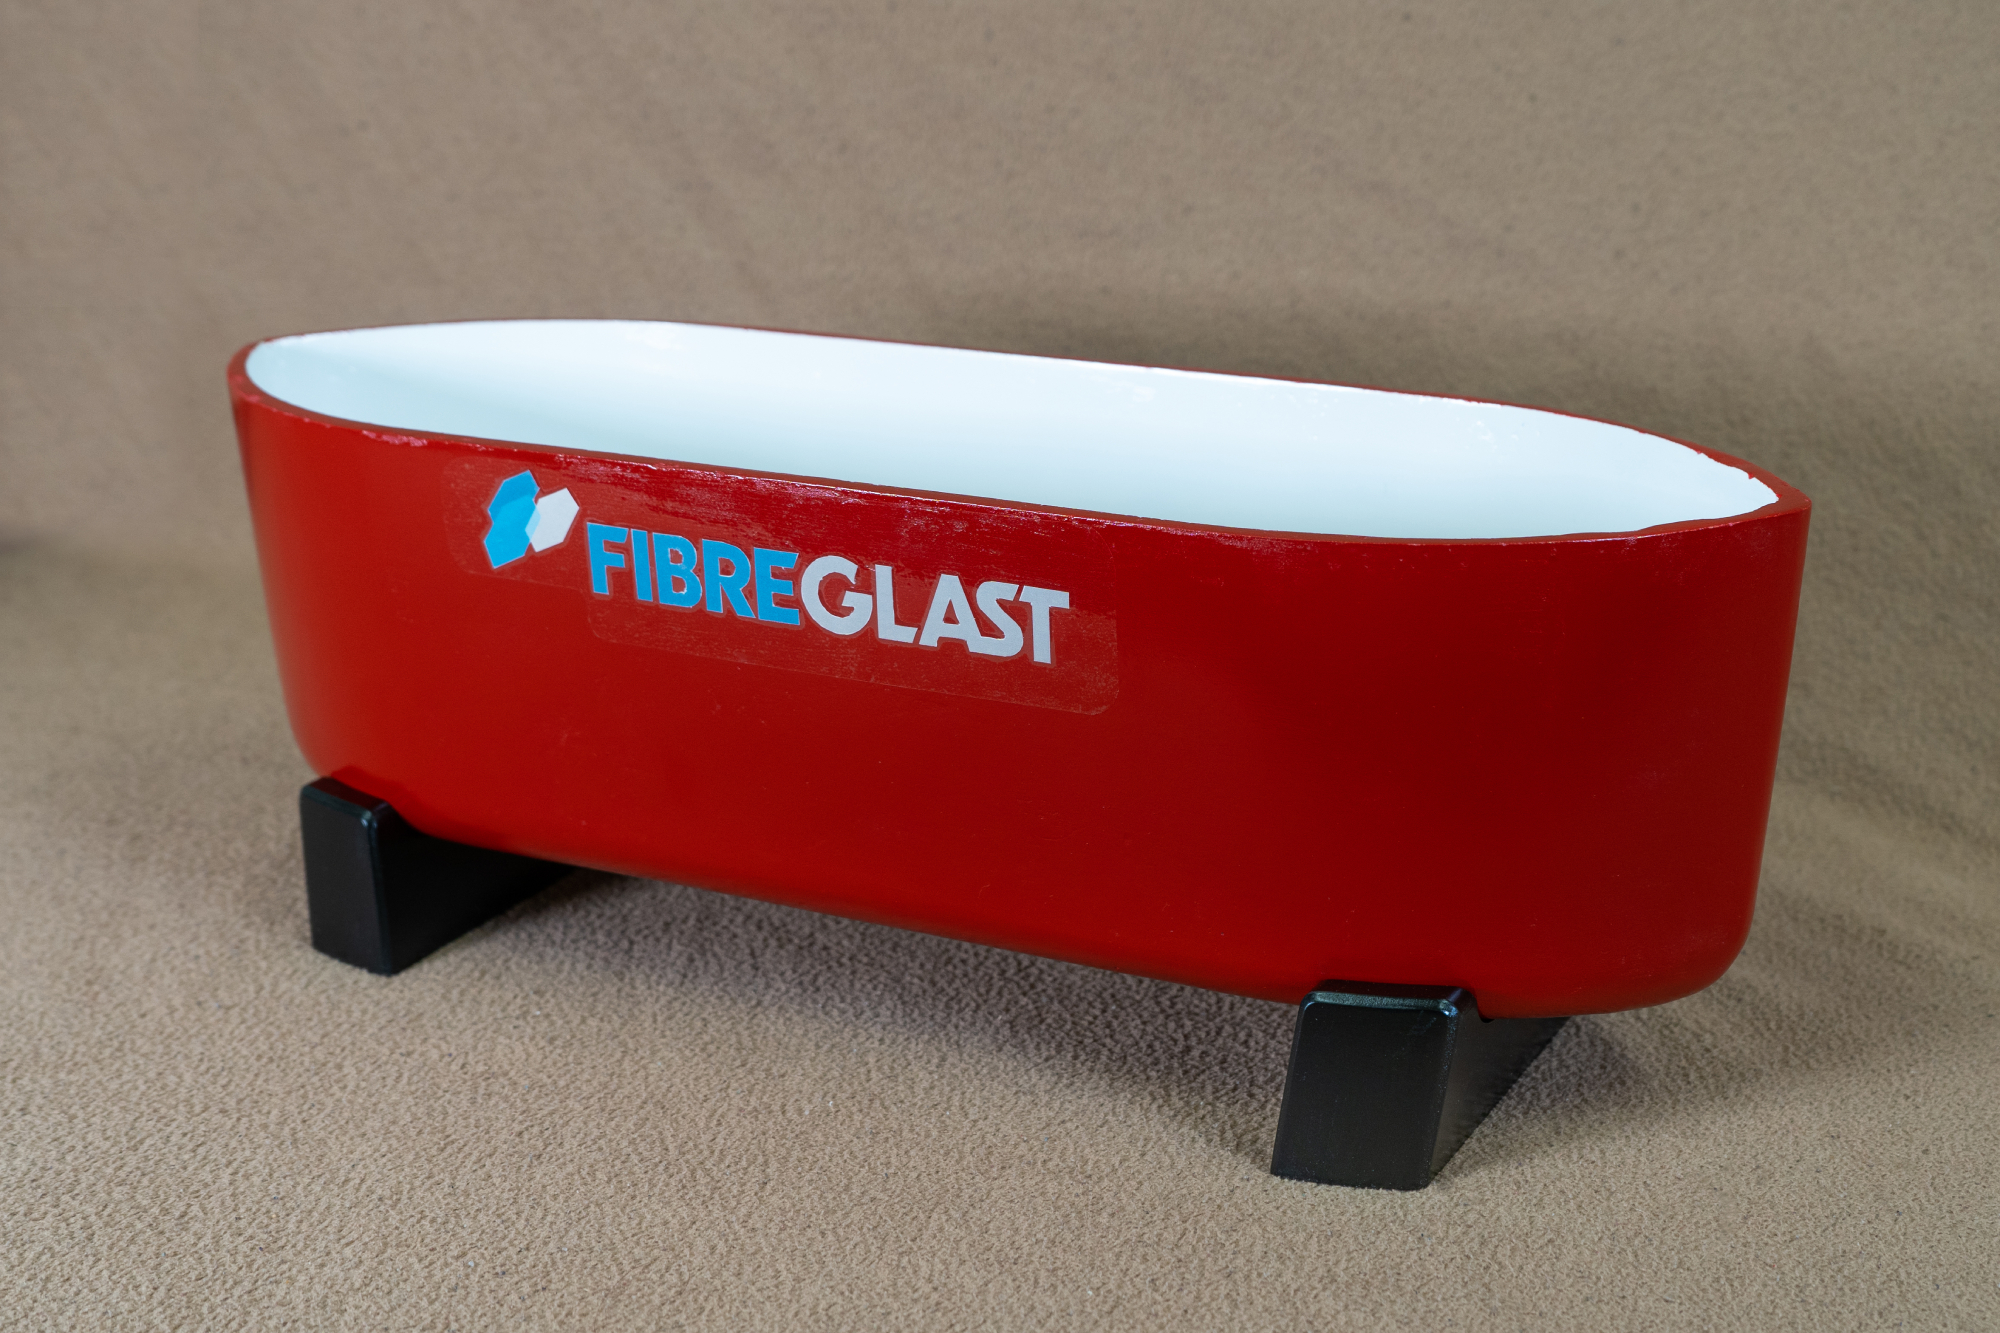
The final product after painting and applying custom made decals. The boat held within 1% of its estimated carrying capacity. It beat the entire freshman class that participated in the competition and beat the nearest competitor by double, holding ~5.6 kg. For reference, the maximum buoyancy force in a 18" x 6" x 5" volume is 8.85 kgf. The sponsor I had brought onto the project was immensely satisfied with the performance of my project.
